Thursday, December 31, 2009

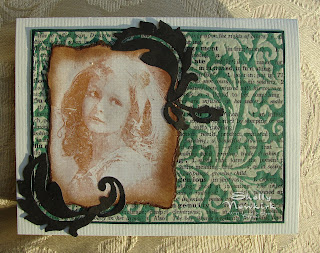
Butterfly Collage Stamp


The card base of this design has been covered with scrapbook paper and the edges sponged lightly with a dark brown ink.
Spellbinders made the die for the die cut on the right side of the card. It was cut and embossed, then lightly sponged with dark brown ink to accent the embossing even more.
I can not tell you who made the stamp. The butterfly itself is accented with a clear sparkle gel pen to pop the butterfly image in the collage. The square edges have been distressed with a thread cutter and then heavily sponged with black ink to give a burned and vintage look.

Tuesday, December 29, 2009

You Answer Me


Layers, wow, do I like to use layers! I used the parts of the pendant that are cut out and made them accents. Spellbinders Label and Pendant dies were used. The papers are from DCWV Tahiti stack and the stamped phrase is made my Our Daily Bread Designs.
The stamped phrase has been accented with a white pen.
A black card base was used. More to come, I am still creating with my paper, stamps and dies.

Monday, December 28, 2009

Die cuts, stamps and paper


With some great dies, high quality stamps and gorgeous paper you can create so much. Dies by Spellbinders, stamps by Our Daily Bread Designs and papers by DCWV.
The pieces on the far left and right are a Spellbinders Borderabilities that has been cut in half. I do like the framing effect that it gives.
Hope this has inspired some of you. I have certainly had a great time creating with these tools.

Saturday, December 26, 2009

Everything Beautiful


Oh, oh, oh, oh........I have been having sooooooo much fun. Our Daily Bread Designs stamps that I got myself for Christmas. (yes, I was a VERY good girl, just ask Santa), Spellbinders Labels and Pendants dies and DCWV Tahiti stacks.
The perfect adhesive backed half pearls are from Creative Impressions. This was a very fun and elegant card to create.

Friday, December 25, 2009

Faux Lace


A few weeks ago there was a video on USArt Quest on making faux lace. Double sided tape is laid down on the card stock. You can tell from the pictures of the cards that the rows of tape were fairly close together. I had to try several kinds of double sided tape before I found one that would "roll" when I rubbed over it.

I rubbed over the tape going both directions. Next was a mica powder that I dabbed on here and there with my finger. After that I put some metallic flakes on and rubbed off the excess with a stiff brush. To get rid of that finally little bit of tackiness a sparkly embossing powder was applied and heated.

The die cuts are from Spellbinders Label Series. The texture is from a Cuttlebug A2 Embossing Folder.

This is a fun new technique that is easy to do and impressive when finished.


Thursday, December 24, 2009

The Last of the Christmas Cards


I was sorting out my stash of cards and found some older cards that I had done. The red and black card was so dramatic and elegant. I think I need to use my mulberry paper more often.

The collage stamp was used over a Glimmer Mists shimmery background. Sadly the pictures just can't do justice to the beauty of the Glimmer Mists. The stamp is unmounted and I have no idea who is the maker.

A piece of scrapbook paper attached to the front of a card base, an evergreen tree embossed with green sparkly embossing powder and a Christmas phrase. A quick, easy and elegant card.


This is a window card. The snowflake is a Sizzix cut and emboss die. Two snowflakes glued together with the fishing line in the middle. The frame hides where the glue has been applied to hold the snowflake in place in the window.
The phrase is computer generated. I have no idea who is the maker of the snowflake stamp. Another of those purchased years ago at a convention as an unmounted.

Tuesday, December 22, 2009

Let It Snow


Since I know very well that I can't prevent the coming predicted snow I have decided to be happy about it. Okay, not happy, but at least accepting.

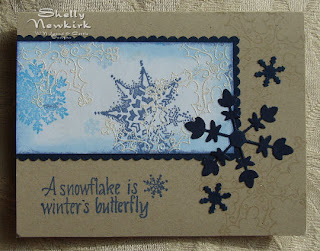
Here again the Spellbinder's Impressibilites was used to create the raised snowflakes. The raised image was lightly brayered over with a medium blue ink. The oval, scalloped oval and the dark blue border on the right of the card to the left were all from Spellbinders dies. The dark blue snowflakes are from various punches and die cuts.


The second card is the same Spellbinders Impressibilites. It has been layered on dark blue and white then mounted on a meduim blue card base.

Saturday, December 19, 2009

Even More Blue Snowflakes


Cut up a dry embossed panel into three rectangles, mount them on some K & Company paper from the latest Christmas stack then layer onto dark blue. Dark blue ink was sponged around the edges.

A second example of my blue snowflake frenzy is also in this post. I created the multi-shaded various blue snowflake paper. You can read the basics of how it was done in yesterday's post.


Friday, December 18, 2009

More Blue Snowflakes


The white and dark blue card stock layers have been die cut with a Spellbinders Labels die. Now that white card stock has been a little "altered". I got out my snowflake stamp collection and went a little over the edge. (aka - out of the box) I also used some white sparkle embossing powder for one snowflake. There are also die cut and punched snowflakes floating around on it too.
The label was cut in half so there are two cards. Note the epoxy bubble over the snowflake on the phrase. It is left over EnviroTex from my last Friendly Plastic session. I used Crafter Pick Ultimate glue to attach it.

Thursday, December 17, 2009

Blue, Tan and White


This color combination and the use of snowflakes was inspired by my stamping friend's blog. Carol Norby has a blog called Stampin Hot In Arizona and it is a "hot" blog. Carol has some great ideas, so stop by her blog and be inspired.
The shades of blue paper used here is from K & Company. I stamped one of my many snowflake stamps on the paper and embossed with a sparkly blue embossing powder.
The Sizzix die cut snowflake is dark blue cardstock. VersaMark ink was brayered on then holgram embossing powder was used.
The ink used on the rest of the stamped images is Blue Iris Chalk ink.

Wednesday, December 16, 2009

Glimmer Mist Background


The stamp used here is a background stamp, but is now the focal point of the card.
I used Glimmer Mists to create a shimmery background, then stamped the Merry Christmas stamp with VersaMark and embossed with fineline black.
The layer in is black, gold gift wrap and a nutmeg brown. A white card base was used.
So background stamps are not just for backgrounds. Hmmm - I have been told by an authority that a true crafter disregards all the rules and voids all the warranty's when they are truly creating. Yup, I agree.
AND boy is it a lot of fun.

Monday, December 14, 2009


All three cards were created using Spellbinders Impressabilities. These are amazing embossing templates. They can be used as I did as a whole or cut apart.

When using any type of embossing plate or folder I would recommend that you use some type of "softener" for the paper. My preferred product is Wonder Goo. You can also spritz or mist lightly with water. This gives a much crisper finished product.


The Merry Christmas was stamped on the first card before embossing. To make the embossed snowflakes stand out even more a brayer inked with light blue dye based ink was used.
Best brayer method, a very very light touch. This keeps the brayer on top of the embossed image. I just hate it when the brayer inks the valleys.
The second card has layering and a punched out glitter snowflake that has been encased in EnviroTex resin.


This third card has an added snowflake that is covered in metal flakes. The layering here is very basic. A little darker blue ink was used to enhance the embossed snowflake design.

Thursday, December 10, 2009

Nativity Card


What a fun card to make? I had to save just one to look at all through the year.
This is a die cut set from Quickut. I have no idea if they are still selling it. I got it over a year ago.
The card base is a tan with a mountain scene stamped in a tan that was several shades darker. I did use a gel sparkle pen on the star.

Monday, December 7, 2009

Beautiful Little Girl


Another stamp by Second Star On The Right. The stamped image did not turn out well when I reduced the size of the photo.
The die cuts are from Bosskut. The card base is paper from a DCWV (Die Cuts With a View) stack called Old World. The three pearls are from Creative Impressions.
The edges of the card base and the oval stamped image have been sponged to give vintage look and to add depth.
I usually stamp the highly detailed "art" stamps on glossy paper and put the ink on the stamp with a brayer.

Saturday, December 5, 2009

It's Christmas Time Again


The front of the card base is covered with scrapbook paper. The edges of the card have been sponged with dark green ink.


Stamp credits - phrase by Paper Impressions
I can not find this company on Gingerstamp.

Gingerstamp is a website with a very current links to most current stamp company and accessory websites. It is a wonderful resource.

pine bough - PSX Personal Stamp Exchange - the date on the stamp is 1996, I have had this one for a while and it is still a favorite.


The phrase is stamped with dark green ink. The pine bough is embossed with a dark green sparkle embossing powder.


Now for that fancy edged white cardstock piece that has the phrase stamped on it. (please note that the edges are sponged with dark green ink) Sigh, you are going to hate me for this little bit of enabling. This fancy edge has been done with a set of two punches from EK Success's Martha Stewart line. They are called Punch Around The Page. I love the product. The set runs about $25 - $27. I found mine at Michael's and had a terrible time deciding which set I wanted. There are some fantastic punches in this new line. Get out your coupon cutter cause you are going to want all of these, they are unlike anything else out there.

Sunday, November 29, 2009

Yet More Dictionary Backgrounds

The lavender card has the dictionary background
attached directly to the card.
Die cuts by Quickut.
Little girl image by Second Star On The Right
and background stamp by Stamp Camp.
A Sizzix die was used to cut the scalloped frame.
It was glued on the card and then darker ink was
carefully applied around the out sideedge.
Background stamp by Judikins.
Little girl with dolls stamp by Second Star On The Right.
Die cuts by Quickut. Background stamp by Judikins.

On this card the dictionary background is layered on the card front.
The background stamp is by Stamp Camp
and the little girl image by Second Star On The Right.
Die cuts from Quickut.
Can you tell that I have had an exceptional amount of fun
tearing up my old dictionarys, using my Second Star on the Right stamps
and playing with the resist technique??????
Next I want to try this resist technique on old atlas maps.
But that will have to wait until after I get my Christmas card
making frenzy over with.


Friday, November 27, 2009

Dictionary part 3


Some more dictionary pages that have become backgrounds. The die cuts are from Bosskut, the background stamp is from Stamp Camp and the little girl image is from Second Star On The Right.


Thursday, November 26, 2009

The Leaves Are Falling


Some the trees here in western Nebraska are still dropping leaves. The slightest breeze has a cascade of leaves to intrigue our half grown kittens.

My stamping buddy and good friend, Bettye, had a stack of 8 1/2 x 11 papers that she did not want. Bettye is constantly giving me stamps or paper that she is no longer using or can't figure out how to use. What a great challenge!!!!


So with a thanks to Bettye, here is what I did with some of the papers. The last card is the only one that actually has stamping on it. The dark torn background has VersaMark stamped leaves with clear embossing powder.


I buy very little scrapbook paper with scrapbooking in mind. I am a stamper and card maker first and that is how I think and see papers and embellishments.

Wednesday, November 25, 2009

Stamping on Your Dictionary


Another look at using resist stamping on a dictionary page. Two different stamps were used for the resist. The flourish background is from Stamp Camp. Judikins is maker of the brown swirly background.
This lovely little girl is an image by Second Star On the Right. I bought mine in 2003 but can not find them anywhere now. I know the stamp line sold to another company and was available there for a while, but has now disappeared.


The highly detailed art stamps work best on glossy paper. I use a brayer to ink my stamp and go over it repeatedly to prevent any lines. Noe that I lightly sponged the edges of the image.
Quickutz is the maker of the die cuts framing the card that is in shade of brown. I sponged darker brown ink around the edges of the die cuts.

Monday, November 23, 2009

A Deer Tale

I don't know if this is a true story or not, but you will be crying with laughter by the time you get to the end of it. (and I suspect that parts of it are very true, I know some cowboys that would do this and I know deer can be very dangerous when trapped)

Author unknown - probably for good reason

Actual letter from someone who farms, writes well and tried this:

I had this idea that I could rope a deet, put it in a stall, feed in a stall, feed it up on corn for a couple of weeks, then kill it and eat it. The first step in this adventure was getting a deer. I figured that, since they congregate at my cattle feeder and do not seem to have much fear of me when we are there (a bold one will sometimes come right up and sniff at the bags of feed while I am in the back of the truck not 4 feet away), is should not be difficult to rope one, get up to it and toss a bag over its head (to calm it down) then hog tie it and transport it home.

I filled the cattle feeder then hid down at the end with my rope. The cattle having seen the roping thing before, stayed well back. They were not having any of it. After about 20 minutes, my deer showed up-- 3 of them. I picked out a likely looking one, stepped out from the end of the feeder, and threw my rope. The deer just stood there and stared at me. I wrapped the rope arouind my waist and twisted the end so I would have a good hold.

The deer still just stood there and stared at me, but you could tell it was mildly concerned about the whole rope situation. I took a stepp towards it, it took a step away. I put a little tension on the rope...., and then received an education. The first thing that I learned is that while a deer may just stand there lookin at you funny while you rope it, they are spurred to action when you start pulling on that rope.

The deer EXPLODED. The second thing I learned is that pound for pound, a deer is a LOT stonger than a cow or a colt. A cow or a colt in that weight range I could fight down with some dignity. A deer ..... no chance.

The thing ran and bucked and twisted and pulled. There was no controlling it and certainly no getting close to it. As it jerked me off my feet and started dragging me across the ground, it occurred to me that having a deer on a rope was not nearly as good an idea as I had originally imagined. The only upside is that they do not have as much stamina as many other animals.

A brief 10 minutes later, It was tired and not nearly as quick to jerk me off my feet and drag me when I managed to get up. It took me a few minutes to realize this, since I was mostly blinded by the blood flowing our of the big gash in my head. At that point, I had lost my taste for corn-fed venison. I just wanted to get that devil creature off the end of that rope.

I figured if I just let it of with the rope hanging around its neck, it would likely die slow and painfully somewhere. At the time, there was no love at all between me and that deer.. At that moment, I hated the thing, and I would venture to guess that the feeling was mutual. Despite the gash in my head and the several large knots where I had cleverly arrested the deer's momentum by bracing my head against vaious large rocks as it dragged me across the ground, I could still think clearly enough to recognize that there was a small chance that I shared some tiny amount of responsibility for the situation we were in. I didn't want the deer to suffer a slow death, so I managed to get i lined back up in between my truck and the feeder - a little trap I had set before hand.....kind of like a squeeze chute. I got it to back in there and I started moving up so I could get my rope back.

Did you know that deer bite?????

They do! I never in a millions years wouild have thought that a deer would bite somebody, so I was very surprised when.....I reached up there to grab that rope and the deer grabbed hold of my wrist. Now, when a deer bites you, it is not like being bit by a horse whwere they just bite you and then let go. A deer bites you and shakes its head--almost like a pit bull. They bite HARD and it hurts.

The proper thing to do when a deer bites you is probably to freeze and draw back slowly. I tried screaming and shaking instead. My method was ineffective.

It seems like the deer was biting and shaking for several minutes, but it was likely only several seconds. I, being smarter than a deer (though you may be questionin that claim by now), tricked it. While I kept it busy tearing the tendons out of my right arm, I reached up with my left hand and pulled that rope loose.

That was when I got my final lesson in deer behavior for the day.

Deer will strike at you with their front feet. They rear right up on their back feet and strike right about head and shoulder level, and their hooves are surprisingly sharp. I learned a long time ago that, when an animal -- like a horse-- strikes at you with their hovers and you can't get away easily, the best thing to do is try to make a loud noise and make an aggressive move towards the animal. This will usually cause them to back down a bit so you can escape.

This was not a horse. This was a deer, so obviously, such trickery would not work. In the course of a millisecond, I devised a different strategy. I screamed like a woman and tried to turn and run. The reason I had always been told NOT to try and to turn and run from a horse that paws at you is that there is a good chance that it will hit you in the back of the head. Deer may not be so different from horses after all,besides being twice as strong and three times as evil, because the second I turned to run, it hit me right in the back of the head and knocked me down.

Now, when a deer paws at you and knocks you down, it does nto immediately leave. I suspect it does not recognize that the danger has passed. What they do instead is paw your bakc and jump up and down on you while you are laying there crying like a little girl and covering you head.

I finally managed to crawl under the truck and the deer went away. So now I know why ehn people go deer hunting they bring a rifle with a scope to sort of even the odds.

All these events are ture so help me God....An Educated Rancher

Friday, November 20, 2009

Dictionary part 2


More sampes of the dictionary background page. The brown background has metal accents from a Spellbinders pendant die. The oval girl is a stamp from Second Star On The Right. The company and it's stamps has apparently disappeared. I bought mine in 2003. They are fantastic stamps and you will be seeing some more of these images in the near future.
The die cuts on the other three cards are from Bosskut. This company has some of the most amazing dies.


Wednesday, November 18, 2009

Use Your Dictionary!


The background for these cards is dictionary page. Using a bold Stamp Camp background stamp, the image was stamped with Tsukineko's VersaMark and embossed with clear glossy embossing powder. After the heated and embossed powder had cooled, the unembossed area was inked using a makeup sponge.

In the purple version the entire card front is cover with the dictionary page, while the blue


version is layered on dark blue cardstock and then mounted on the card base.

The image of the girl reading the book is from Stamp of Excellence. These are wonderful stamps that I just love. Judi doesnt' have a website up and running just yet but you can find her at 1105 Main Street in Canon City CO or email her for a catalog, judisox@qwestoffice.net.
Be prepared for some fantastic stamps. I had a terrible time deciding which stamper were my favorites, sigh, I need a money tree that grows year round with people like Judi around making stamps.

More dictionary backgrounds to be posted soon.

Saturday, November 14, 2009

Papercasting On Stamps


Supplies:
kleenex or toilet paper (depending on size of stamp used)
liquid starch
small stencil brush
bold stamp
water colors (the inexpensive kid's water colors will work)
paint brush
1. Mix in a container 1 part liquid starch and 1 part water
2. Paint on your stamp. Don't use too much as it spreads out. Some people color at the end of the process.
3. Lay the kleenex over the stamp.
4. Dip stencil brush in starch mixture and begin to tamp the stencil brush up and down to push the kleenex into the depressions in the rubber stamp.
5. Add layers of kleenex. Tamp carefully so you don't tear the kleenex, yet get the paper into all the grooves.
6. You may only have to use the starch mix with every other layer. It just depends on how much starch the kleenex you use absorbs and how well it is going into the depressions on the stamps.
7. You can use from 5 to 10 layers of kleenex. It depends on how thick you want your paper casting.
8. When you are satisfied with the thickness or your papercasting, carefully tear paper around the edge of the stamp. I found that I had to firmly hold the paper on the stamp with one hand and tear with the other.
9. Now is when you can do you water coloring if you didn't do it at the start.
10. Gently remover your paper casting from the stamp and lay aside to dry. I have tried using my heat gun to hurry the drying. Don't, it will bubble and curl. You can straighten a flatten a little, but be careful or you will remove all stamp image from the paper.
This is pretty tough when dry, but you can flattten the image out of the paper very easily when it is wet. There can be a little coloring when dry, but again, it is easy to destroy the image from the stamp. I have used Rub and Buff to high light or accented with some markers.

Wednesday, November 11, 2009

Paper Ribbons


Paper ribbons can be addictive. You will find yourself buying scrapbook papers that coordinate just so you can make these lovely cards.

If you use text weight papers, you will be able to fold them in half and then punch. This will line the designs up across from each other perfectly.


I have found the Fiskars border punches to be rather fragile. They are not meant for anything heavier than a light weight text paper. You can prolong the life of them by placing the heel of your hand on the pivot point and them pressing the lever to punch. Other wise the plastic and the little pin that are the pivot area will break. Sadly most other punches of this type are made pretty much the same way.
I also used various decorative scissors to achieve the look that I wanted. One way to make sure you get an even cut with your scissors is to draw a line on the back of the paper and use that as a guide for your cut.
On the very widest parts I simply punched one long narrow strip and carefully attached them one at a time to the ribbon. That way you can match up the punched designs on either side and not use as much paper which reduces the over weight of the card.

Monday, November 9, 2009

Christmas Card Designs


It's getting to be that time of year again. I have been playing with several ideas for Christmas cards. While I like both of these designs, they are to labor intensive to make 50 of them.

The pine bough image is from Hero Arts. The lovely Merry Christmas image on the top card is from a company called My Sentiments Exactly. The Merry Christmas with holly is from Rubber Baby Buggy Bumpers, which is no longer in business. The pine cone image on the second card is from PSX, aka Personal Stamp Exchange. I have found a few of their stamps at Sierra Enterprises. They have a very limited supply and may not have the pine cone stamp.


I used Ranger Distressed inks for the pine bough and the distressing around the edges of the cards.
The phrases on both cards have been embossed with fineline black embossing powder. Gold fineline embossing powder was used on the pine cone.

Saturday, November 7, 2009

Mother and Child


Here is another lovely image from Second Star On The Right. It is a highly detailed art stamp.
The card is relatively simple. The corner punch makes a striking frame.
Now if some of my friends would just become grandmothers, I am all set with the perfect card.

Friday, November 6, 2009

Layered Medallion


This card may look difficult, but if you look closely you will see that it is simply mulitiple layers.
The while textured layer is paintable textured wallpaper. Gift wrap was used for the metallic golds. One layer was cut with a decorative scissors.
One thing I like about this type of card is the mutliple uses. I could stamp something across the bottom for a specific occasion or leave it plain and put a note on the inside.
Rather than the punched medallion in the center, you could pick a stamped medallion or use a variety of stamped of textured squares or rectangles to create your beginning medallion. There are endless possiblities here.

Wednesday, November 4, 2009

Precious Girl


This precious girl image is a stamp. The company was Second Star On the Right. I have had it for at least 10 years. I did a search for the company and could not find it.
There is a little trick to getting these highly detailed art stamps to stamp well. First you need to prime you stamp. Ink it up and stamp on scrap paper several times. I like to use a brayer to ink up these type of stamps. You will have to go over the stamp from several directions to get an even inking that has no lines in it. Glossy paper seems to work better than matte. If you ink pad is too juicy, the ink will pool on the stamp between the fine lines and dots and be a blob when you stamp it. This is why I like the brayer, I can't get too much ink on the rubber.