Showing posts with label Hero Arts. Show all posts

Thursday, January 19, 2012

Isaiah 41:10

Here is a relatively simple design that showcases scripture.
The scripture was designed using PSP X.
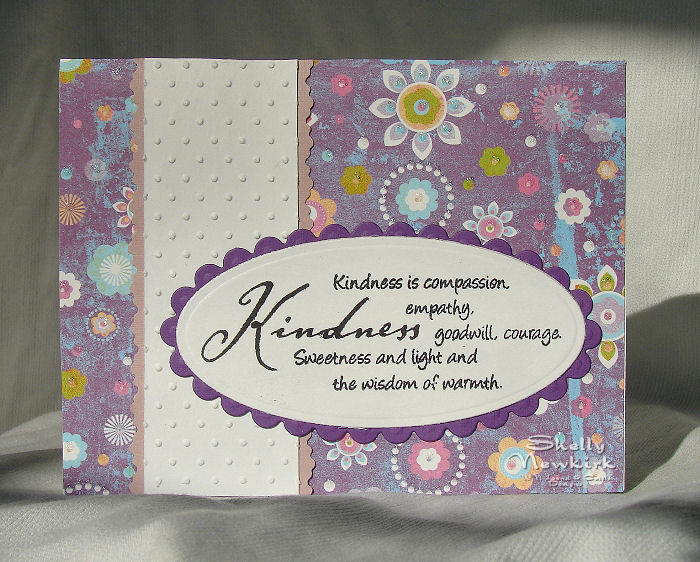
Fonts used are CAC Champagne and ST Honeymoon.

After adjusting the size of my scripture in Word
it was printed in 2 column format.
A Spellbinders die was used to cut it out.
The edges of the die and the card base
were sponged with Ranger Archival coffee and black inks.
A very thin edging of black creates the faux burned look.

The pine branch stamp is from Hero Arts.
First I inked it with a dark green Distressed ink.
Stamp once on scrap paper and THEN
stamp on the card to give a shadow appearance.

The pine branches were cut using a Cheery Lynn Designs die.
The pine cones are the fun part. Just punching them
out and leaving them flat was very ordinary and boring.
So I tried scrunching the punched pine cone.
I really scrunched it into a tiny ball.
Then only partial smoothed it out.
That gave the little pine cones a lot of texture.
At least they look a little more real now.

Tuesday, October 26, 2010

Butterfly

Start with a lavender or mauve card stock. Next
add texture to that card stock. Folders, plates,
whatever you have that will work.
Attach the texturized card stock
to a card base.

I used the Spellbinders Lotus Pendant for the lacy
white die cut. Quickuts made the two part
butterfly die. A polished stone background was
used for the colored part of the butterfly with
black text weight paper used for the veining detail.
A small phrase stamp from Hero Arts was
die cut with an oval, mounted on a card stock
that coordinated with the mauve or lavender
and trimmed with a deckle scissors.

Monday, October 4, 2010

Kindness


Tan card stock, cut to 4.25 x 5.5 and textured
with a wood look Sizzix texture plate.
Load your sponge with dark brown ink and
lightly rub over the texture to make
the wood look stand out more.
I also "burned" the edges by sponging some black ink
on the very edge.

Begin with a phrase by Hero Arts that is cut out with a
Spellbinders Label die. Sponge the
die cut with same brown as the phrase
and then "burn" the edge with a black sponging.
Layer that on top of
a Spellbinders Pendant die cut from dark
brown card stock.

Wednesday, September 29, 2010

I'm Baacckk!!!


The last 2 weeks have been so insane and stressful.
My husband's 92.75 year old father passed away
and his mother is not doing well at all.
My mother is in the final stages of Parkinson's
(but she has been in this condition for 6 months, so
this could go on for a long long time) and we have
an uncle that has just gone into hospice.

So a simple sympathy card seems to fit.
This a paper quilting border/ribbon with a
very small Hero Arts stamped phrase
in one of the squares.
The card base front is cover with a texture
that was done in an embossing folder.

Wednesday, July 7, 2010

An Experiment

There was really no solid plan involved here. It was one of those, "I wonder what this would look like?" designs.

The beginning was sponging the colors on through an oval stencil that was cut with a Spellbinders Mega Oval die. Next came the flower stamped in dark brown and finally the phrase. Both stamps by Hero Arts.

I had a card base that was waiting to be used and this was the perfect design for it.

The textured light mauve paper that is attached to the card base is from a Sizzix texture plate.

Sunday, June 6, 2010

Alike Yet Not Alike

Here is another set of cards in a series that
I had so much fun creating.
All the cards have a "left-side bar"
and that is all that is exactly alike on them.
In the above card the flower print is
echoed in the punch on the right side.
Cream paper with brown ink was
used for the Hero Arts phrase.
I liked the cream and brown combination
for a softer look.

The square side bar on the above card was from
A DCWV mat stack. The small squares are echoed
in the embossing of the back ground paper.
Squares are sharper, more precise, so a white
card stock and black ink was used for the
Hero Arts stamped phrase.

Oh my, a background paper that is NOT embossed.
This paper is from DCWV. Note the embossed
white paper on the side bar. Small ripple decorative
scissors by Fiskars were used to trim the mauve layer
under the dotted Swiss embossed paper.
The phrase was layered over dark purple
for a little more contrast and
just because I thought it looked better that way.

This side bar print paper was a left over piece
from the background paper on the previous card.
It was layered onto white and then dark purple.
This really pops the white in the print paper.
Pale lavender checkerboard embossed card stock
was used for the background.
The oval die cut and the scalloped oval die cut
are from Spellbinders Mega Oval series.

Monday, May 24, 2010

New Designs

While in Lincoln, I paid a little visit to the Micheal's store. I had to, I had TWO 50% off coupons. I am sure you all understand exactly why I had to go there.

What did I get? The two punches used on the left side bar.

The lavender textured paper that completely covers the card base was done with a Spellbinders Impressibilities.

The stamped phrase is from a Hero Arts clear stamp set. Spellbinders is also the maker of the die cut used for the phrase. Punch Bunch manufactured the flower and leaf punches.

Paper on the side bar is unknown.

Sunday, March 28, 2010

On Safari Again

When I got the Safari stack from DCWV I was stepping totally outside my comfort zone. The idea behind the purchase was to make more neutral or even man type cards.

The card on the left is a very very simple design. The card front has been totally covered with scrapbook paper from the DCWV Safari 8x8 stack.

The bar on the left was attached to dark brown card stock and cut with decorative scissors. My thinking on using the scallops was to match the circular patterns on the paper.

Next was stamping the paw prints. These were an unmounted stamps that I have had for ages and have absolutely no idea who made them. I punched them out with some Punch Bunch punches. The bottom layer is from a paint chip.

The Happy Birthday is from Hero Arts, with partial paw prints on the top. This punched square was then layered onto corrugated paper that had the edges heavily sponged with dark brown ink.


There is nothing creative about this card. It is the image that was already on the paper found in the DCWV Safari 8x8 stack, simply glued to a card base.

With the right scrapbook paper cards can be really really fast and simple.

It would take nothing to stamp or computer generate a small phase, punch, cut or tear it out and attach somewhere on the front. Ten minutes at the most and you have an attractive card.

Tuesday, February 9, 2010

African Sunset


The sunset and tree are from the Safari DCWV 8x8 stack. I glued it to my card base.
The lion image is from PSX (Personal Stamp Exchange, no longer available), the phrase is from Hero Arts and I have absolutely no idea where that little animal track is from.
I used Punch Bunch punches to punch out the track and the phrase and the paint chip they are layered on. I am going to recommend The Punch Bunch as a very fine company to purchase punches from. I have NEVER had a bad punch from them. They punch clean on text and card stock weight papers. I have a lot (I mean a whole lot) of these punches and have been very satisfied with them. They are a small mom and pop company that does not sell to the large chains. You will have to go to a privately owned scrap or stamp store to find Punch Bunch punches.

Sunday, October 25, 2009

Watercolor Flowers part 3


These are not exactly watercolor flowers. This was part of an experiment to see what I could do in black and grey. Of cours after you get the image stamped then you have to come up with some type of a card design. That is often far more difficult than the stamping part.


The grey background on the card on the left is a a stamp from B & J Art Stamps. The black flower image is from Hero Arts. The unusual thing about this design is that textured white background. It is paintable wallpaper. One roll will last you a long long long time. It can be used plain or you can try multiple ways of coloring it.


This grey background image is a stamp from Yvonne Albritten Designs. I can not find a website for this company, so I have no idea if they are still in business. The black flower image is another from Hero Arts. This time the textured background is silk wall paper. I have this particular wall paper in cream and white. It was found with some slightly frayed ends in the sale bin. What a bargain!
These are both simple designs. Feel free to copy and tweak to make them your own.
Happy stamping and God Bless

Wednesday, March 4, 2009

Take Time


Another Glimmer Mist and stencil background.
One is slightly darker than the other. Both have black dye based ink sponged around the outer edges of the card.

The card front was done on a seperate piece of paper and glued to the card base to get a nice crisp flat card.
Place your card under a heavy book for a few hours and when you take it out you will be amazed at how flat it is.

The stamped phrase is by Hero Arts and the tree image is by Inkadinkadoo.

They were both stamped with VersaMark and fine line black embossing powder was applied.
Very simple cards. If you have backgrounds made up a
and waiting - this is a ten minute or less card to produce.