Friday, July 20, 2012

Dealing with the heat!

 Our cats stretched out on the just watered grass
in the shade.  This is how cats deal with the heat.
The littlest kitty sleeping on the deck.

Wednesday, July 18, 2012

A Sympathy Card

Lots of texture in this design.
I began with a white card base.  
The bottom 2/3 of the card is cover with a lavender
card stock that has been textured in an embossing folder.
The top 1/3 of the card is covered with a darker
lavender card stock that is again textured in 
an embossing folder.

The white dotted Swiss textured scallop covers
the joining of the two shades of lavender.
Over this is a scripture that has been created in
Paint Shop Pro X.  It was cut out with a
Spellbinders oval die and layered on dark purple
card stock.

Accenting the oval are punched and shaped white flowers
that were punched with those fantastic Punch Bunch punches.
The green flourish is a Bosscut die that has been
cut apart and tucked under the flowers and oval.

Thursday, July 5, 2012

Lattice with purple

I tried a variety of backgrounds with the 
Cheery Lynn Designs lattice.
This time it is a plain lavender card stock

The flowers are a mauve with yellow centers
and the leaves are an almost lacy look that
I think is intended as a pine bough.
Well it is multiple use now.

The butterfly is cut from metallic gift wrap that
has been attached to card stock. 
The under wings are vellum.

Wednesday, July 4, 2012

Branch With Blue Flowers

I just love this card.  It is so simple and yet
so very elegant.

Begin with a white card base.  
Use a 4 1/4 x 5 1/2 inch piece of white
card stock and the
embossing folder of your choice.
 Attach this to the card base. 

The brown branch has been cut with a Tim Holtz
Sizzix die.  It had a bird on it, which I cut off.

The flowers are from blue vellum and 
punched with Punch Bunch punches.
The flower centers are from a sun burst punch
using white card stock.
Leaves are a pale green and hardly 
noticeable, but do add a lot to the over all look.

The phrase is computer generated in
Paint Shop Pro X using the Mutlu font.
It was then copied to Word where
I could get it to the size that I wanted
and print multiple phrases on the same sheet
of card stock.
It was cut into a rectangle, attached to
the same blue vellum that the flowers
are made of.  I used a Perfect Layers ruler 
to cut the borders all exactly the same.
The finishing touch is a tiny blue flower
with tiny pale green leaves on 
the lower left corner. 


Sunday, July 1, 2012

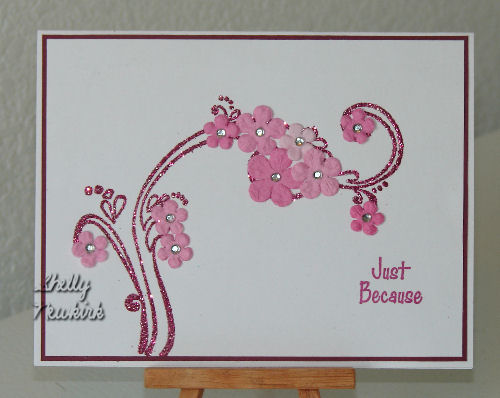
Flourishes and Flowers

 A very clean and simple design.  
I played in my studio and came up with three different versions.
The one above is a single flourish stamp.
It was stamped with VersaMark and a
glitter rose embossing powder for some glitz.
The flowers are from Michael's Recollections line
of paper flowers that are purchased in a glass bottle.
Tiny rhinestones are in the center of each flower.
I used one of my small phrase stamps combined with
a raspberry-ish ink.
 This one is on black card stock.
Two flourish stamps were used with
gold embossing powder.
The small phrase has been embossed with
fine line white embossing powder.
The flowers are from a pearlized paper.
Here is a glittery teal embossing powder
makes this flourish outstanding.
The butterfly has been covered with fine glitter,
shaped with a stylus and has rhinestones covering it's body.
The small word is stamped in black ink.

Saturday, June 30, 2012

Take Refuge In The Lord

Another lattice card.  Just in case you haven't noticed by 
now, I really really like this lattice die by Cheery Lynn Designs.

This time the card base is first covered with a beige and
white scrapbook paper, aka DP, aka designer paper.
The lattice is attached over the DP.
I use Crafter's Pick Ultimate glue.
A small amount is squeezed out on an old CD
and picked up with a toothpick.  I use
that toothpick to carefully apply glue in tiny dots 
all around the edge of the lattice and in each area 
where the lines of the lattice join.  This gives
a secure attachment to the card base.

The phrase is computer generated using
Paint Shop Pro X.  It has been die cut using
Spellbinders nesting rectangle and a Label die cut under that.
These were given a 3-D look by gluing cut up
flat pieces of paper egg carton.

The flowers and leaves where punched with
my trusty Punch Bunch punches.
The white flowers are from a pearlized white paper.
The center is a pearlized gold paper.

Gift wrap attached to card stock was used
to create the paper for the Cheery Lynn Designs butterfly.

Three pearls were place in the upper right corner of the
scripture as a final design element.

Friday, June 29, 2012

Butterfly on a Bush

This was so much fun to design.  My goal was to let
as much of the background and lattice show as possible.
I wanted a dainty branch with tiny Babies Breath type flowers.

The mottled greenish background is 
made with Glimmer Mists on white card stock.
It has been attached to a white card base.

The large white lattice was cut from a die
made by Cheery Lynn Designs.
The green branches are also a Cheery Lynn Designs
die cut that has been carefully placed
to give the appearance of a single branch.

The tiny white flowers are from a Punch Bunch punch.
They have been shaped with a stylus and a
gel pen was used to color the centers.

The butterfly is a Cheery Lynn Designs die.
It was cut from gift wrap that had been
glued to card stock.
Plain vellum was used to create the second layer
of the butterfly wings.

Wednesday, June 27, 2012

Thinking of You

When you make cards a gifts you have to think generic.
This phrase can be used for just about anything because
someone can write their sentiment on the inside.
It will work for birthday, sympathy, get well, etc.

The white card base is cover with a medium lavender
light weight card stock.
One of Cheery Lynn Designs lattice die cuts
was attached over that.

The phrase is computer generated in PSP X using
the free font Mutlu.  I cut it out in a long rectangle
and then rounded all four corners.
This is mounted 3-D over a Spellbinders Label die
that has been textured using Cuttlebug's dotted Swiss folder
and is also a 3-D over the card base.
I use cut up pieces of paper egg cartons for the 3-D projects.
I am recycling, I am frugal, ok, I admit it, I am cheap.
I never run out of paper egg cartons like I have pop dots.

The flowers are from lavender vellum.
Leaves, flowers and flower centers are all from
the wonderful line of Punch Bunch punches.

The butterfly is a Cheery Lynn Designs die cut.
It has been cut from gift wrap that is attached to light 
weight card stock.  The under lay of the butterfly
is plain vellum.

Wednesday, June 13, 2012

Three "Thinking of You" Designs

 The back ground on the top card is Glimmer Mists on
white card stock.  This was attached to the card base.
The back ground on the last two cards is a
Karen Foster DP (for those of you who asked and
who were not brave enough to ask DP stands for designer paper or scrapbook paper). 
The white die cut lattice that is on all three cards is
a die cut from Cheery Lynn Designs.

The phrase has been computer generated using the Mutlu font.
They have been cut out using Spellbinders Labels and Ovals.
The flowers and leaves have been punched using Punch Bunch punches.

Sunday, June 10, 2012

Just a Note

This is a classic "Thirds" card.
The bottom two thirds of the card is covered 
with a Karen Foster DP (designer paper)
that has a floral pattern.  The top one third has
a coordinating green Karen Foster DP.
Marking the division between the thirds is a
band of dark green card stock that
has been cut with a border punch and a
narrow strip of the green paper has
been mounted on that.

The phrase is one that I have created in PSP X,
and cut with a Spellbinders oval die.  (Paint Shop Pro 10)
The lovely flourishes on either side were
die cut from a Cheery Lynn Designs die.

This is a very simple design, yet because of the colors
and placement it is very striking.

Wednesday, May 30, 2012

Bronze Butterfly

Begin with a plain white card base.  The entire card
front is covered with DP (designer paper aka scrapbook paper)
Over that place two difference sizes of Spellbinders beaded ovals.
The beaded ovals have an oval of DP that coordinates with 
the DP that covers the card base.

The flourishes and butterfly are from Cheery Lynn Designs.
The flourish is from a much larger die cut that has
been carefully cut apart.  (Victorian Flourish)
The butterfly has been cut from a bronze gift wrap that is
attached to card stock.

Monday, May 28, 2012

On Being Prehistoric

 I saw this phrase several months ago and it just stuck
in my mind.  I thought it was such a totally cute birthday
card for the right person.

 The stickers are from Hobby Lobby.  The puffy cutesy
ones would be great for a child's card.  
The realistic dinosaurs are wonderful for an adult.
The phrase is computer generated and the die cut
leaves are from a Cheery Lynn Designs die.

I have been gone from the blog-o-sphere for almost a
month. My part time job is agricultural statistics.
I gather raw data from farmers, ranchers, grain elevators etc.
I even go into fields and to counts and measures of
wheat and corn to assist the USDA in making the
 most accurate crop estimates possible.
Right now is the absolute busiest time of year for me.

Wednesday, May 2, 2012

Liebster Blog Award


Many thanks to Carol Norby for presenting me with the Leibster Blog Award.
http://www.stampincarol.blogspot.com/ 
You can visit her blog for a whole lot of inspiration.

The origins of the Liebster Blog Award are somewhat unclear, but the general consensus is that it originated in Germany. Liebster, means favorite or dearest, and the Liebster Award is designed to showcase bloggers with fewer than 200 followers. Upon accepting the award, the recipient must pass it on to five more blogs of note.

Okay winners, here’s what you need to do.
1. Thank your Liebster Blog Award presenter on your blog.
2. Link back to the blogger who presented the award to you.
3. Copy and paste the blog award on your blog.
4. Present the Liebster Blog Award to 5 blogs of 200 followers or less who you feel deserve recognition.
5. Let them know they have been chosen by leaving a comment at their blog.


I have chosen these blogs that I follow for the Liebster Blog Award.
Sherry at http://stampingcowgirlcreations.blogspot.com/ 
Benzi at  http://benzistampz.blogspot.com/
Lisa H. at http://creativejuicefreshsqueezed.blogspot.com
Darnell K. at http://www.djkardkreations.com/
Trish G. at http://encouragejoy.blogspot.com/

Friday, April 27, 2012

Tatted Border

This is a fairly simple and basic generic design.
There are varous DP over the cream card base.
The tatted lace look cream border is
a die cut from Cheery Lynn Designs.

Thursday, April 26, 2012

Easy Card

A very easy card that is just so pretty.
The front of the white card base is covered
with a dark green card stock.
The flowered DP (designer paper)  has been cut
slightly smaller than the dark green card stock.
Along the lower edge up about 3/4 of an inch
I drew a line across the back of the DP.
This line was used as a guide for
the decorative scissors.

When the DP was attached to the card front
I left a  small gap between, allowing the dark green
to show through.

The flower is cut from card stock weight
DP, using a Sizzix Tim Holtz extended cut die.
The edge of the flower was distressed with dark
brown ink before folding and the ridges were 
inked after folding.

Friday, April 13, 2012

Lacy Butterfly

This is such a delicate design.
The lacy background is a die cut
from Cheery Lynn Designs.
Now I am going to tell you right up front
that this die cut is a real pain.
I probably ran it through my Cuttlebug
at least 20 times, BUT the end result
is well worth it.
If this seems like too much work just
consider the time and effort that would
go into cutting it with a scissors or straight edge.

The butterfly is also a Cheery Lynn Designs die cut.
It has been cut from highlighting foil that
has been glued to card stock.
There is also a solid "angel wings" piece
under the lavender butterfly that has
been cut from vellum.

The flowers are from punches purchased
from Punch Bunch.  They have been
shaped and formed using a  large stylus.

Friday, April 6, 2012

We are the clay

Isaiah 64:8
Another use of Cheery Lynn Designs
lattice die cut.  It is over a Tattered Angels
glimmer mist background.

The scripture has been cut using one of
Spellbinder's Labels.  Each layer has been lightly
sponged with a pale lavender ink

The flower are punched from vellum.
Flowers, flower centers and leaves
are all punches from Punch Bunch.

Thursday, March 22, 2012

My Song 2 Psalm 118:14

This is the same basic design as yesterday "except"
I used a DP (designer paper) under the lattice.
The lattice is a different color, but the basics are the same.

The flowers are punched and shaped.
It is a busier look and also a little bolder with
the dark burgundy multiple flowers.

Wednesday, March 21, 2012

My Song - Psalm 118:14

A beautiful and inspiring scripture needs a beautiful setting.

This card begins with a plain white A2 card base.
Attached to that is a background made from 
cream card stock that has been colored with
various Glimmer Mists.
The medium brown lattice has been cut from
card stock using a Cheery Lynn Designs dies.

The scripture was printed on white card stock and
die cut using a Spellbinders Label die.  A slightly larger 
and different die was used for the lower layer.
Each layer had the edges sponged with dark
brown ink.

Now each label has the flat part of paper egg
cartons attached to back to create a 3-D look.
The paper egg carton is much cheaper the pop dots.

The flower is was stamped on black card stock with
pigment ink and embossed with fine line gold embossing powder.
It was then painted with twinkling H2O's.

Sunday, March 18, 2012

Double Fold Explosion Card

Here is one of the few cards that will not have an explanation of how it
was made.  I attended the last meeting of an art
group called the Basement Babes in the
home of Jen L. in Lafayette CO this past week.
This was the project.  It is very complicated
and very impressive.
This is the front of the card.
The first unfolding.
The explosion begins with the second unfolding.
Almost full explosion!
Left side of the card.
Right side of the card.
Now you can see why I am not even going to try
to share the instructions.