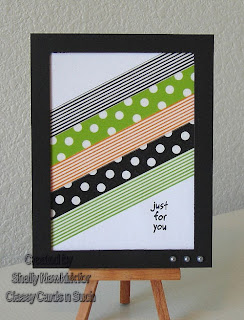
Washi Tape
Classy Cards products used
Spellbinders
Matting Basics die cut
1. Begin with a basic
white card base.
2. Cut a piece of
white card stock slightly smaller than the card front.
About 5.25 x 4
inches.
3. Place Trendy Tape
on the piece of card stock at an angle.
Leave space that
is “untaped” at the upper left and lower right corners.
The ends of the
tape can be folder over the edge of the paper or cut off.
4. A small greeting
can be stamped in either of the above corners.
5. Attach to the card
front.
6. Cut a piece of
black card stock the exact same size as the card front, which
is 5.50 x 4.25
inches.
7. Using one of the
Spellbinders Matting Basics dies create a simple frame.
Place the die in
the center of the black card stock and cut.
The size of the
die will determine the width of your
frame. The smaller the die the wider
the frame.
8. This step can be
skipped if so desired. I like the 3-D
effect created by
attaching flat
pieces of egg carton to the back of the frame.
9. The frame goes
over the Trendy Tape (also known as washi tape) piece
that is attached
to the card front.
10. On the lower
right corner of the frame attach three small gun metal
pearls.


No comments:
Post a Comment